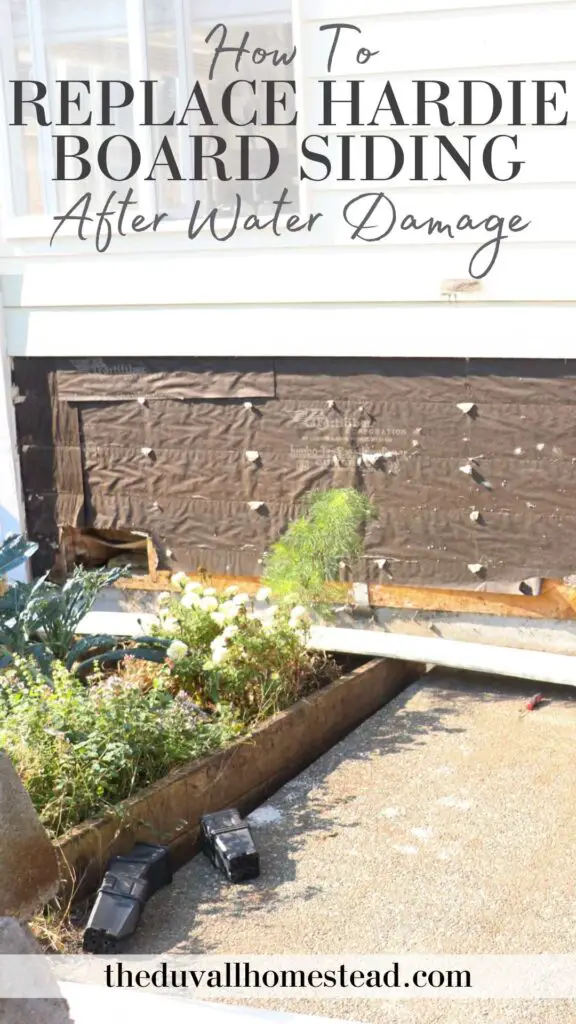
We discovered huge water damage on our house siding after removing the deck a few months ago. After replacing the siding ourselves, John and I realized how easy of a project it was (and way more affordable), especially if you’re only doing a few pieces. Join me as I share the step by step tutorial for how to remove and replace a few pieces of Hardie siding on a house.
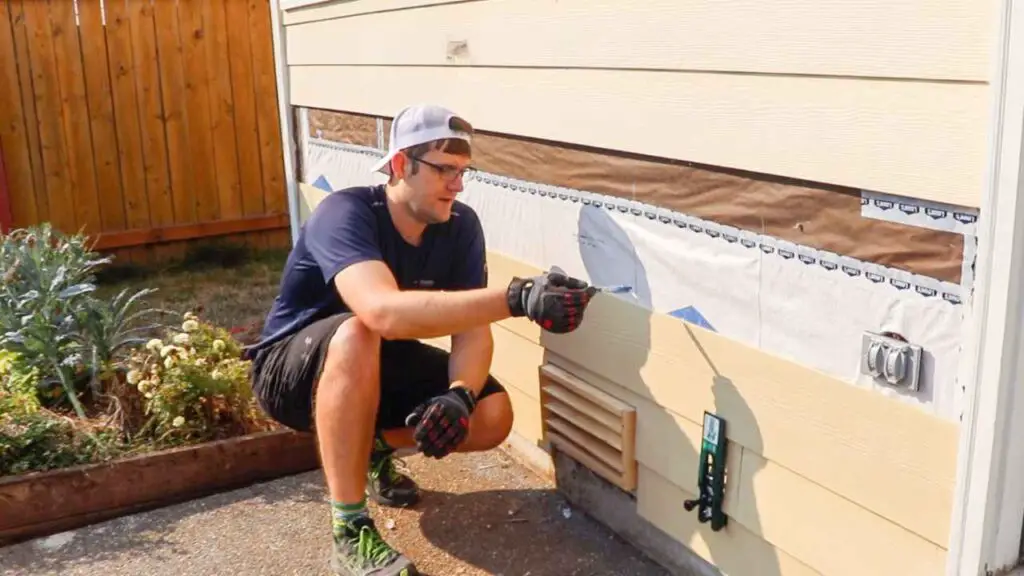
John and I recently replaced some water damaged siding on our house, discovered after we removed our deck a few months back. We realized this was an easy and affordable project! Read on to find out how to replace hardie board house siding.
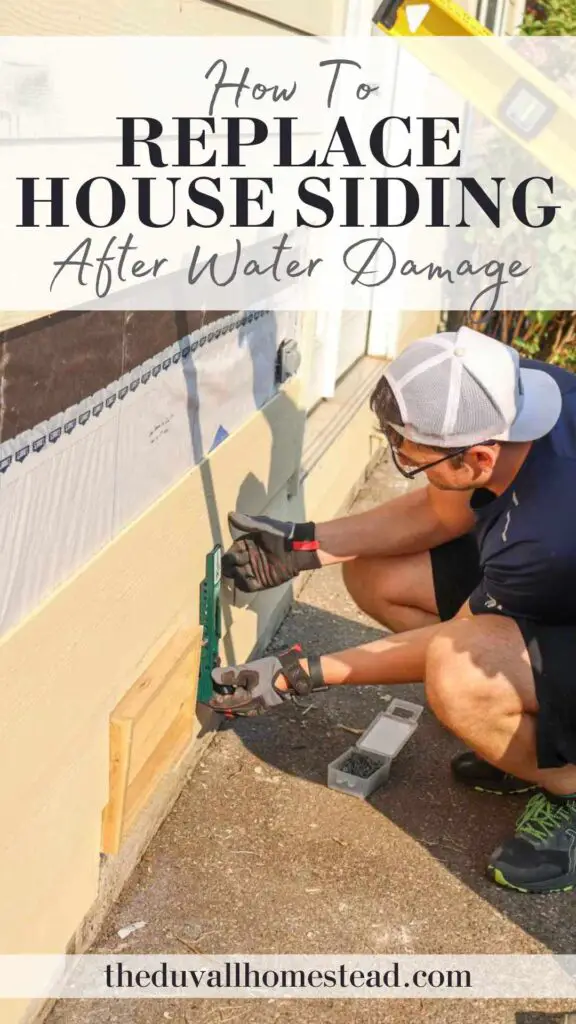
PIN IT FOR LATER!

INTRODUCING THE PATIO MAKEOVER SERIES!
This is the first post in a series I’m calling the Patio Makeover Series, where I show our brand new backyard patio from start to finish.
When we first moved in to our house in 5 years ago there was a deck that extended out into the backyard. It was not made properly, and, after only a couple years, it was degrading pretty bad. Boards were rotting, nails were sticking up; something had to be done.
This was one of those projects that was put on the back burner for a while, but it would just eat away at us every time we looked outside and saw the terrible deck. Eventually, it was so bad it was actually unsafe, especially once our daughter started walking, and we realized it had to go.
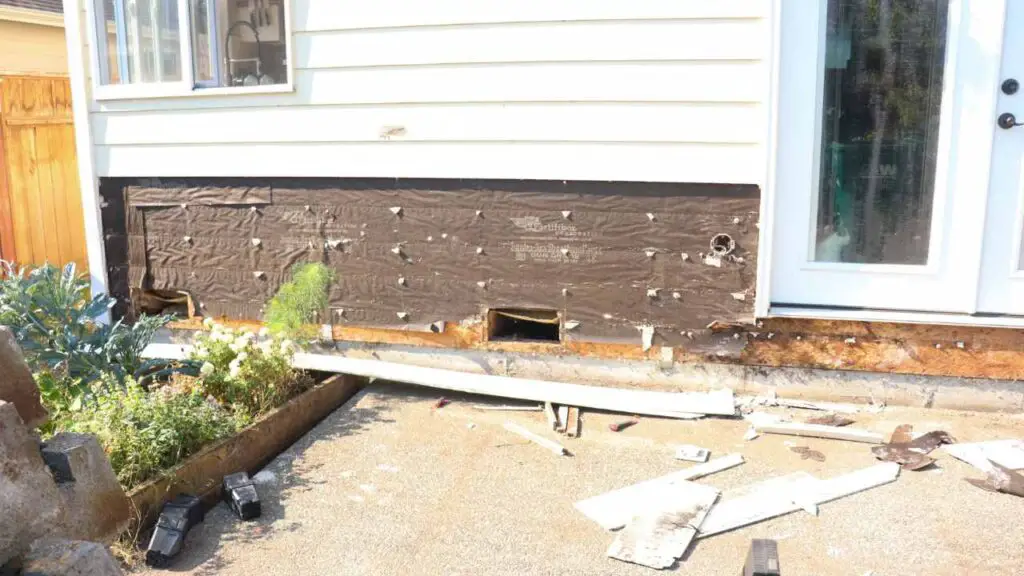
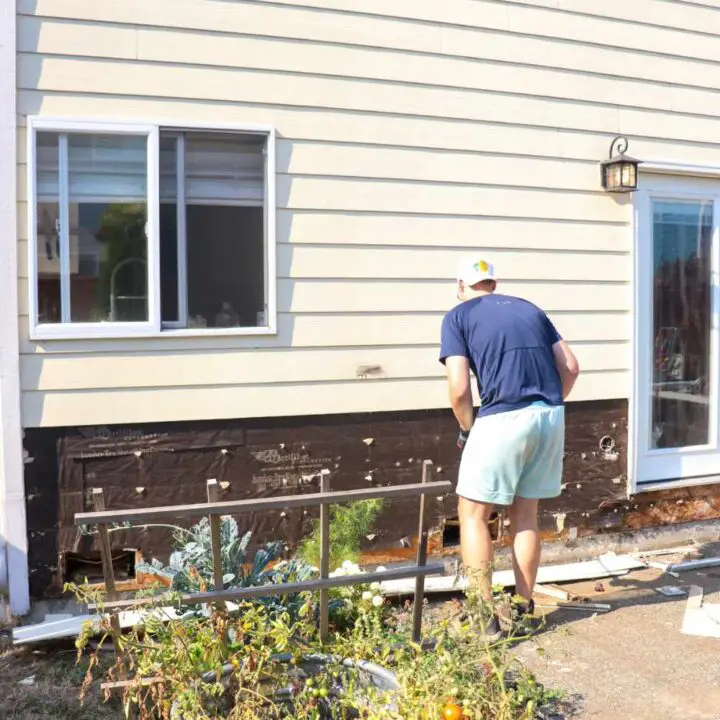
John started tearing up the deck and pulling out old rotten boards and screws. After tearing off the deck boards closest to the house, we noticed some pretty serious water damage to our house siding.
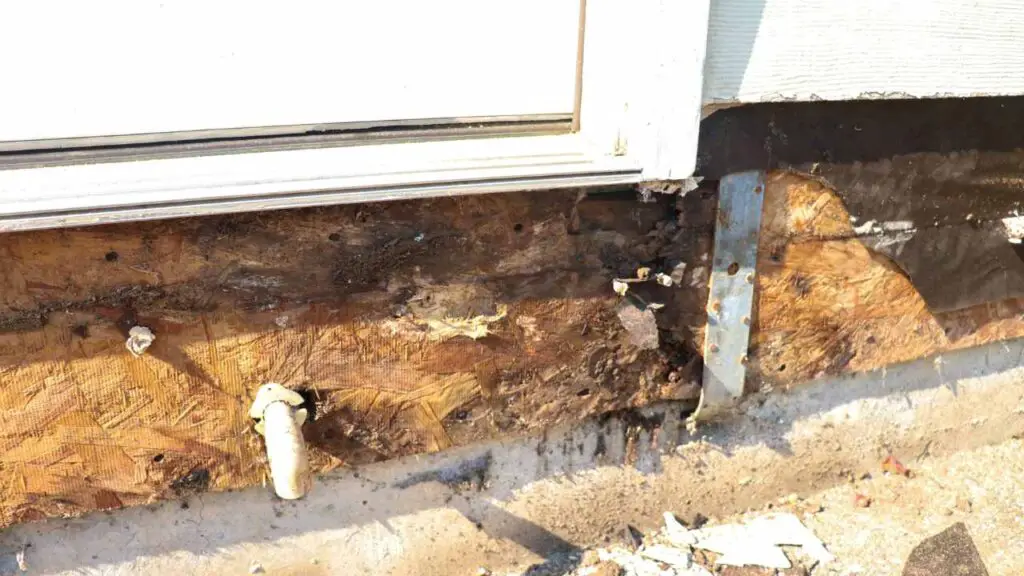
And that’s when we hit a wall and said, OK, we can’t redo this deck right now like we planned. We have to address the water damaged siding first.
So I’ll take you along in this tutorial of our DIY house siding project, and in the coming weeks we’ll share more steps in the patio makeover project. I am looking forward to it!
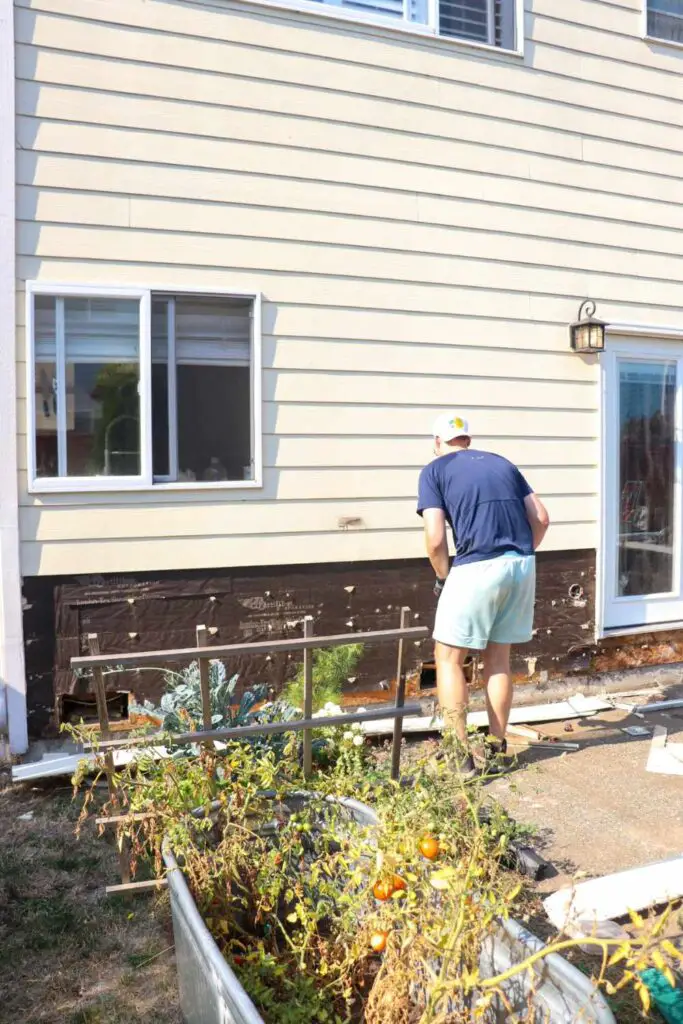
HOW THE ROTTING HAPPENED
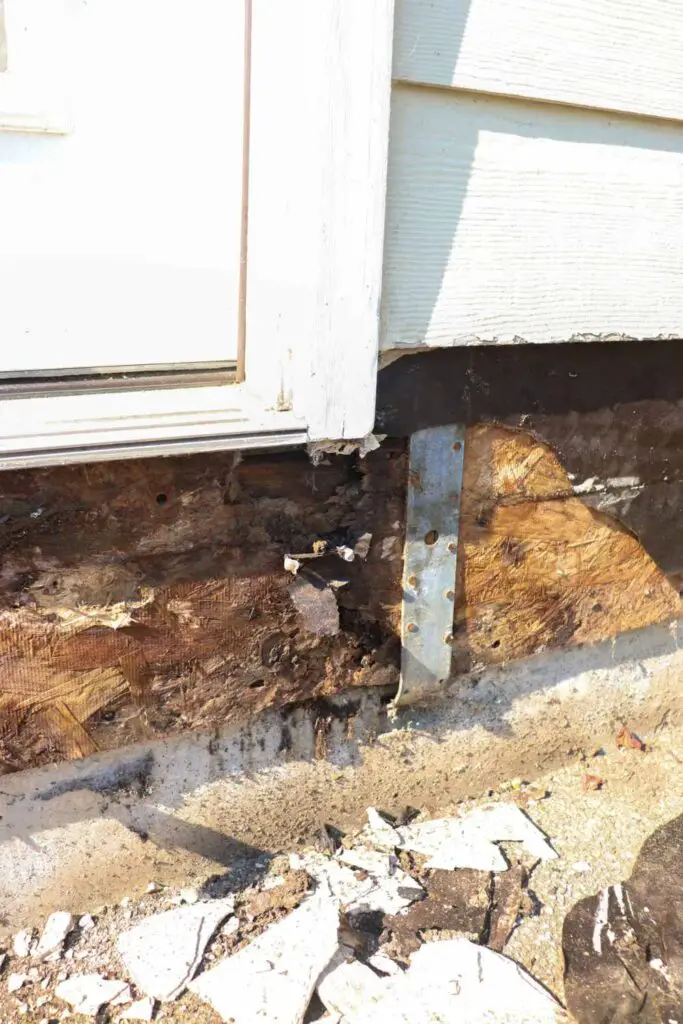
The previous homeowners had a deck that was right up next to the house. Whoever built the deck didn’t put up any flashing, they just put the deck right up next to the siding. The problem with that is, the water had nowhere to go, so it was wood against Hardie board, and the water just penetrated the Hardie board and got up behind the wall. And of course, we never saw this happening, because the deck was hiding it all.
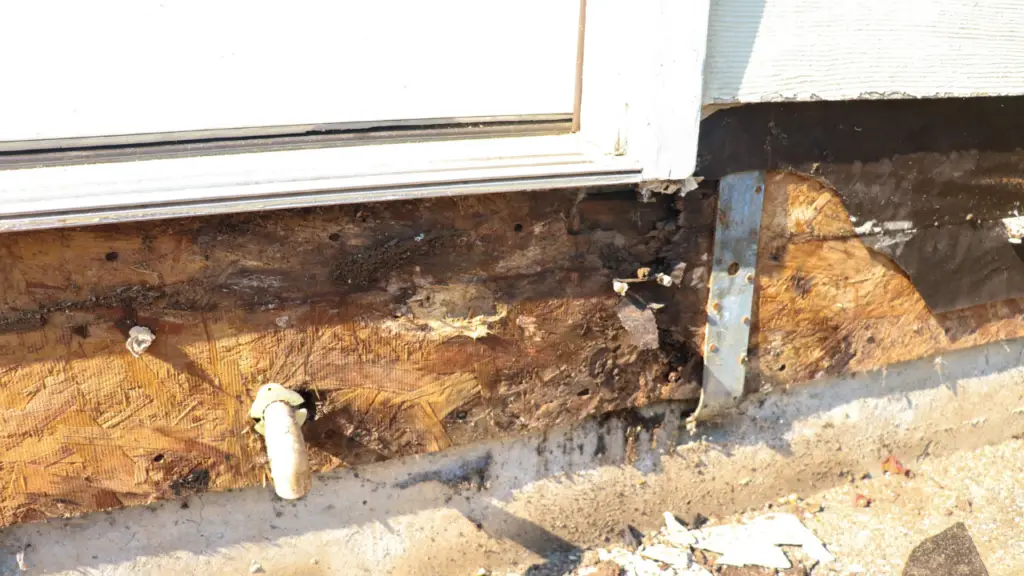
Same with the trim around the door; the trim was installed but they never put flashing around it. When it rains, the water follows a seam, wearing the caulking down, and it pulverized the trim and siding.
This post contains affiliate links, which means I may make a small commission off items you buy at no extra cost to you. As an Amazon associate, I earn on qualifying purchases. See my full disclosure here.
TOOLS NEEDED
Indexing head crow bar (for removing the deck and siding nails)
Sharp box cutter razor blade (for scoring caulk)
Wood Shims (for prying the wood)
6” drill bit extender (for screwing the siding screws in)
Speed square (for measuring cuts)
4 sawhorses (for holding Hardie board siding while cutting)
Carbide tip jigsaw blade (find it here on Amazon)
Working gloves (John’s favorite are an impact-resistant glove from our local Ace Hardware)
Respirator or mask
Chalk line (for marking stud locations on exterior sheathing)
Tyvek wrap (optional, you may not need to replace it if it’s not damaged) Note: we actually did not use “Tyvek” wrap, we used the Lowe’s brand because it allowed for smaller cuts (and was way cheaper!)
Tyvek tape (also optional)
Gecko gauges (1 pack of 2 – tip: try to get them used on Amazon to save money)
HOW TO REPLACE DAMAGED HOUSE SIDING
First inspect the existing siding and determine how many boards you will need to remove.
Get several wedged wood shims and place them under the board you will remove to gain leverage.
Pull up on the Hardie board and wiggle until it breaks free from nail or screw. Pull board down and away from wall.
Repeat this process for all boards you will remove.
Mark nail/screws pattern on exterior sheathing board to ensure you know where studs are. I used a chalk line.
Next remove all visible screws and nails in the wall with a pry bar. Ensure surface is smooth for application of new siding.
Inspect Tyvek or house wrapping for damage. If needed, replace house wrapping. Be sure to overlap old wrapping over new wrapping where joined. This will ensure water runs off in the most efficient route.
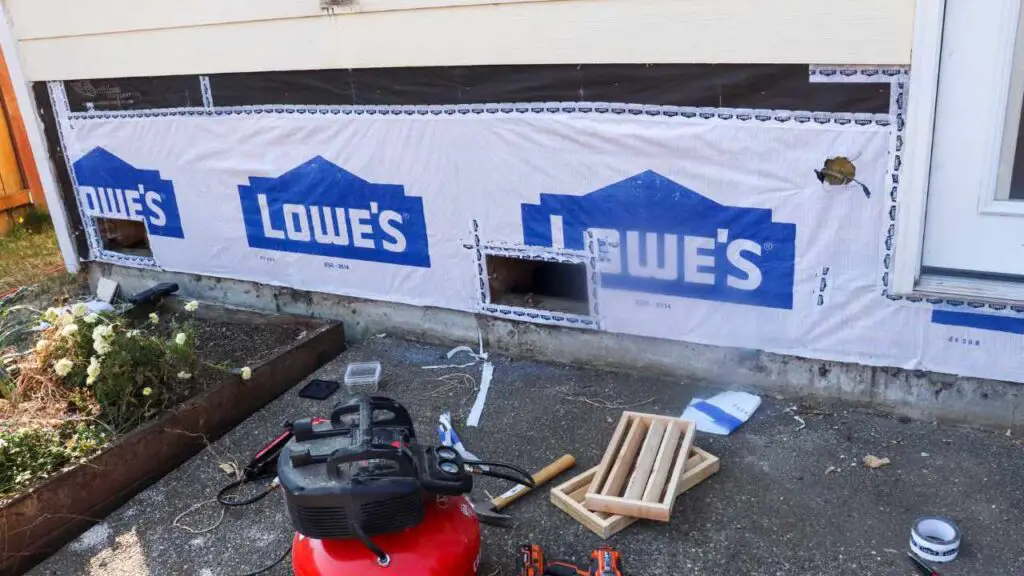
Ensure that all cuts in the wrapping are taped and sealed.
Use gecko gauge set to appropriate siding width to install board. Gecko gauge will ensure board is level, and act as an extra set of hands to hold the siding. I utilized cement board siding screws. This gave me more control over where I placed a screw and the ability to correct if needed.
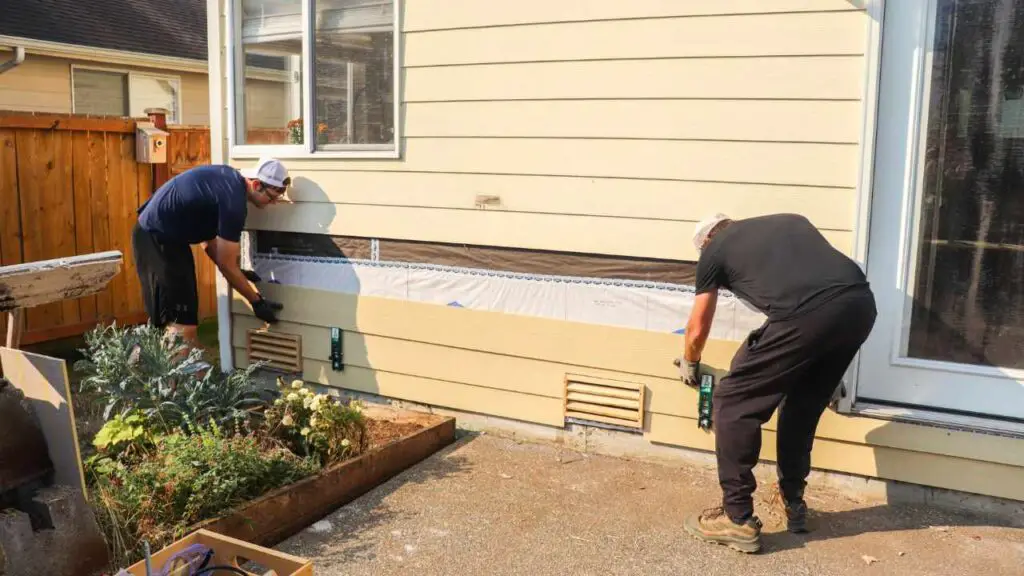
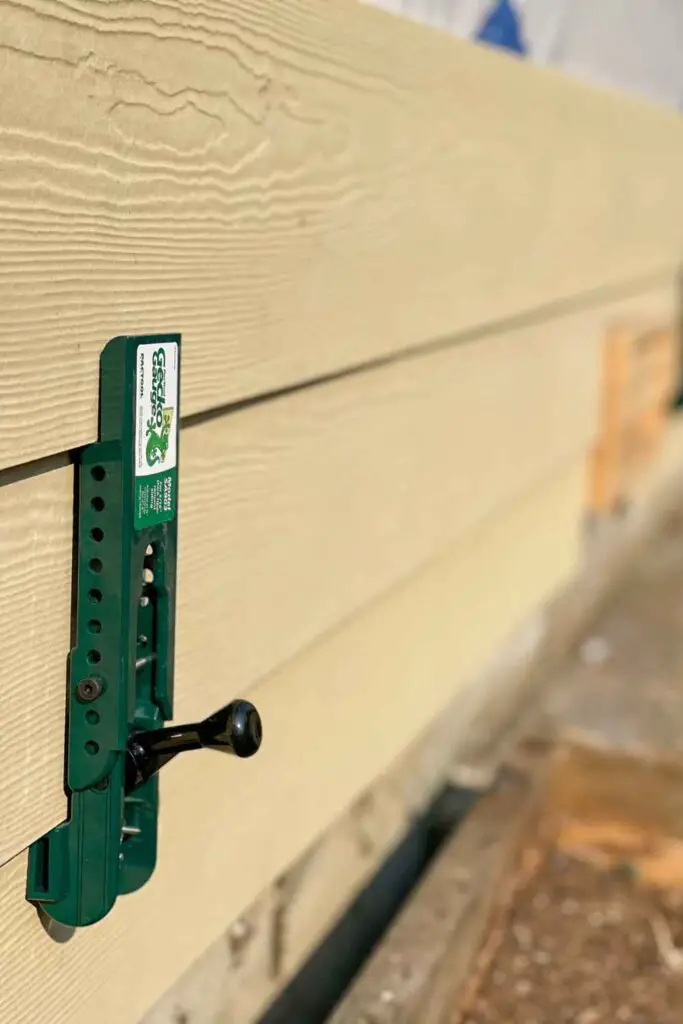
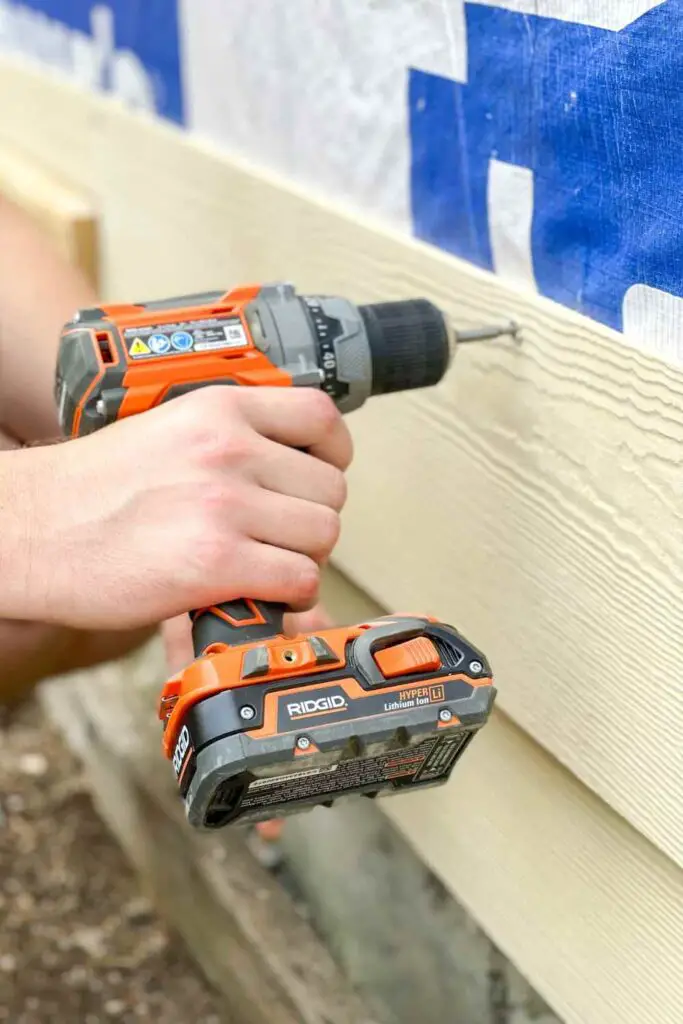
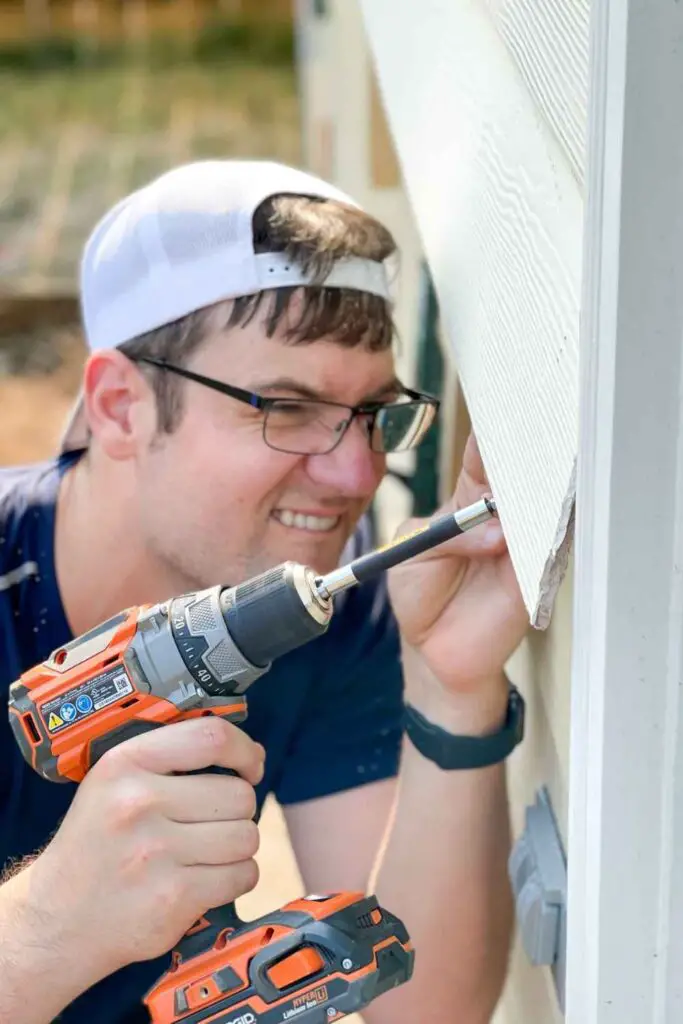
I needed to install a bit extender to be able to reach the screw install location. Ensure your screw placement for new siding will be around 1/4″ below the top of the board. This way, the new board will overlap and cover the screw. This is called blind nailing.
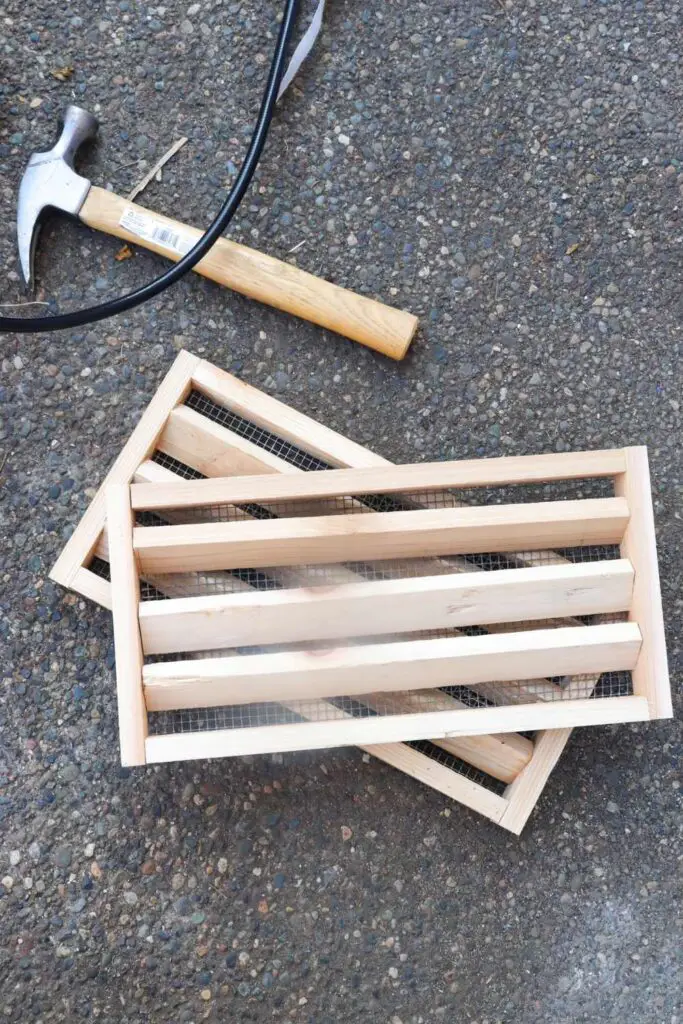
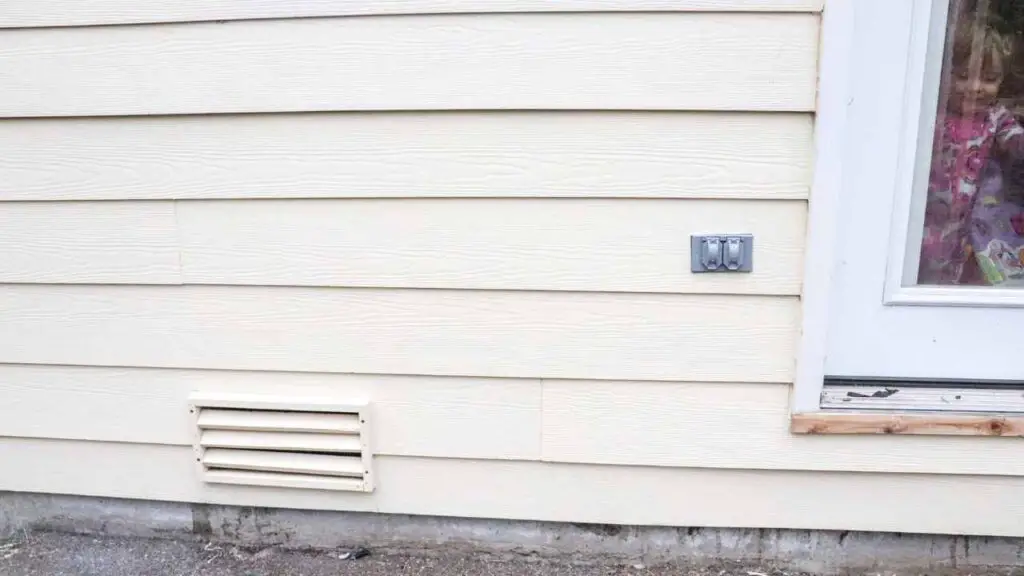
Note: inspect your vents for damage as well. They are very easy to replace with small cedar trim board and a brad nailer.
Repeat this process for every board until the final one. When complete, use latex-based caulk and cover all seams. Wait several hours, then apply paint of choice.
MORE OUTDOOR PROJECTS FROM THE HOMESTEAD
How to Build Porch Steps with Existing Stringers
How to Build a Stand for Trough Planter
FAQ
WHY DOES DAMAGED SIDING NEED TO BE FIXED?
First, to be on the preventative side before adding a new deck or patio. In the future if you install a new deck, you won’t have access to the damaged siding. So, it’s best to replace it as soon as possible before it gets worse and rots completely.
HOW MUCH DOES IT COST TO REPLACE SIDING?
We did have a professional come out and quote us, but he would only give us a quote for half of the house. He said it would be $30,000 for new siding on half the house. No way. Obviously we weren’t about to hire this guy so John decided to do it himself.
In the video John quotes a few hundred dollars, although he doesn’t have the exact amount. I’d say less than $300 assuming you have the tools already. The most expensive part was the siding board.
PIN IT FOR LATER!
DIY House Siding
After seeing water damage we knew we had to replace the siding. Luckily, it wasn't too difficult. Learn how to remove and replace siding in this simple tutorial.
Materials
- James Hardie Board siding
- Tyvek wrap (optional, you may not need to replace it if it’s not damaged) Note: we actually did not use “Tyvek” wrap, we used the Lowe’s brand because it allowed for smaller cuts (and was way cheaper!)
- Tyvek tape (also optional)
Tools
- Indexing head crow bar (for removing the deck and siding nails)
- Sharp box cutter razor blade (for scoring caulk)
- Wood Shims (for prying the wood)
- Cement board siding screws
- 6” drill bit extender (for screwing the siding screws in)
- Speed square (for measuring cuts)
- 4 sawhorses (for holding Hardie board siding while cutting)
- Carbide tip jigsaw blade (find it here on Amazon)
- Working gloves (John’s favorite are an impact-resistant glove from our local Ace Hardware)
- Respirator or mask
- Chalk line (for marking stud locations on exterior sheathing)
- Gecko gauges (1 pack of 2 - tip: try to get them used on Amazon to save money)
Instructions
First inspect the existing siding and determine how many boards you will need to remove.
Get several wedged wood shims and place them under the board you will remove to gain leverage.
Pull up on the Hardie board and wiggle until it breaks free from nail or screw. Pull board down and away from wall.
Repeat this process for all boards you will remove.
Mark nail/screws pattern on exterior sheathing board to ensure you know where studs are. I used a chalk line.
Next remove all visible screws and nails in the wall with a pry bar. Ensure surface is smooth for application of new siding.
Inspect Tyvek or house wrapping for damage. If needed, replace house wrapping. Be sure to overlap old wrapping over new wrapping where joined. This will ensure water runs off in the most efficient route.
Ensure that all cuts in the wrapping are taped and sealed.
Use gecko gauge set to appropriate siding width to install board. Gecko gauge will ensure board is level, and act as an extra set of hands to hold the siding. I utilized cement board siding screws. This gave me more control over where I placed a screw and the ability to correct if needed.
I needed to install a bit extender to be able to reach the screw install location. Ensure your screw placement for new siding will be around 1/4" below the top of the board. This way, the new board will overlap and cover the screw. This is called blind nailing.
Note: inspect your vents for damage as well. They are very easy to replace with small cedar trim board and a brad nailer.
Repeat this process for every board until the final one. When complete, use latex-based caulk and cover all seams. Wait several hours, then apply paint of choice.


Leave A Comment