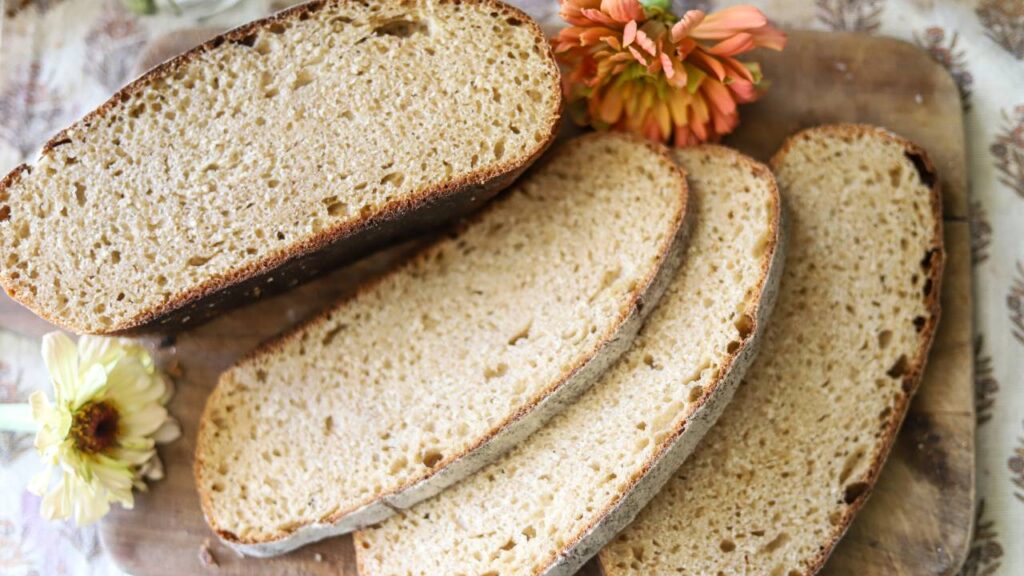
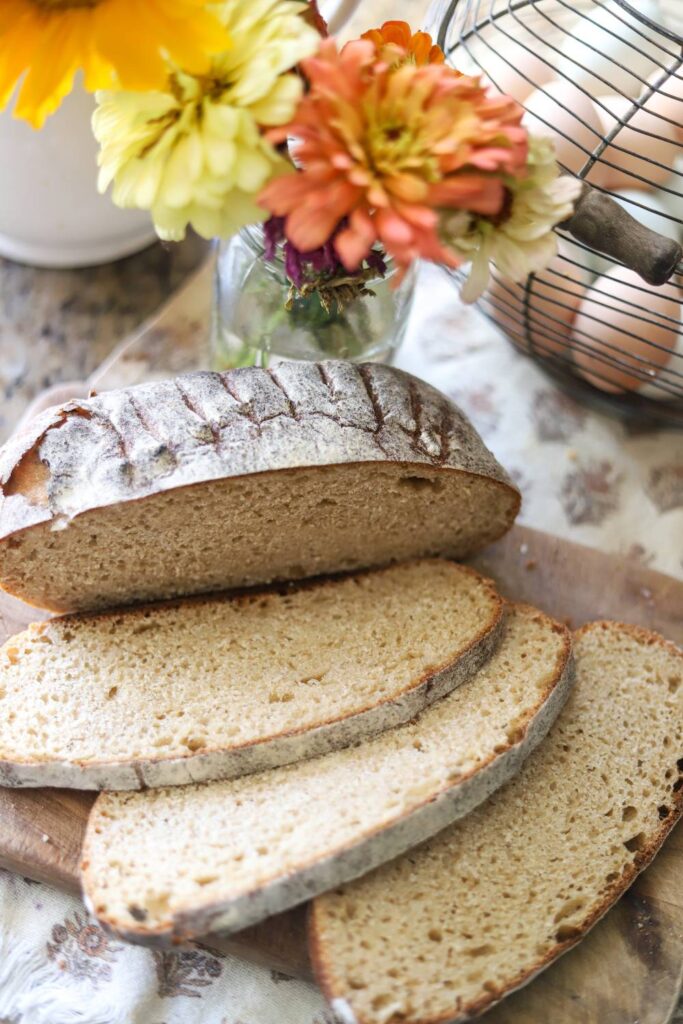
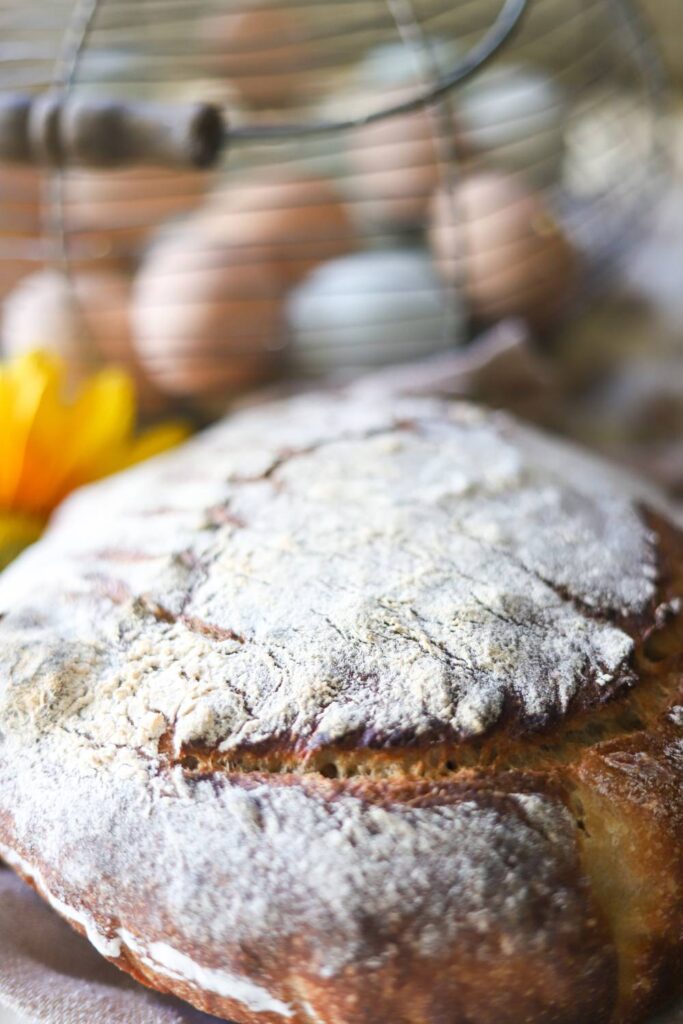
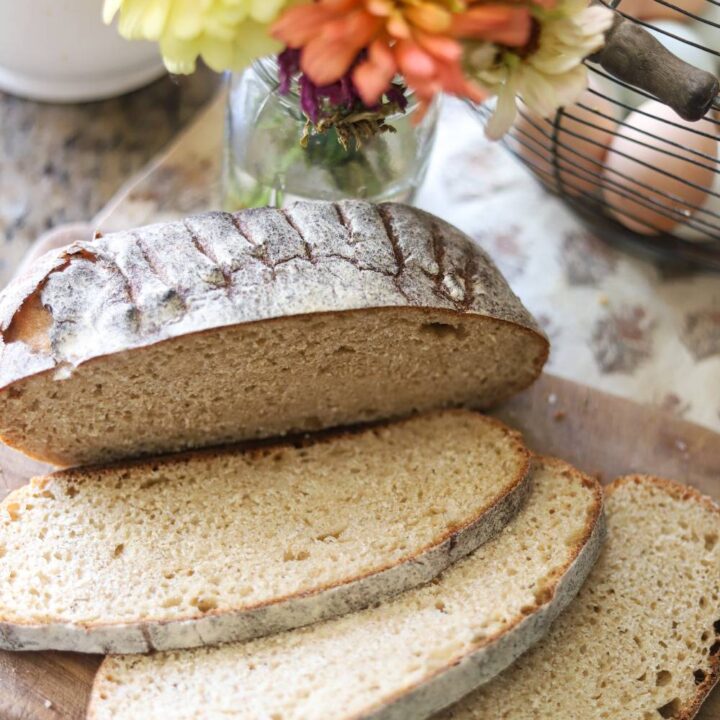
This easy whole grain sourdough boule made with freshly milled flour is healthy and delicious. Learn how to make this beginner-friendly loaf that is packed with nutrition, flavor, and a beautiful golden crust.
This easy whole grain sourdough boule made with freshly milled flour is healthy and delicious. Learn how to make this beginner-friendly loaf that is packed with nutrition, flavor, and a beautiful golden crust.
This post contains affiliate links, which means I may make a small commission off items you buy at no extra cost to you. As an Amazon associate, I earn on qualifying purchases. See my full disclosure here.
Freshly Milled Whole Grain Trend – a trend?
You may have noticed how popular it is today today mill your own grain. People are seeing the health benefit and added nutrition of using whole grain and freshly milling it too.
But this is not a new trend! This is actually an old trend returning.
One of my favorites about milling grain is feeling closer to what our ancestors did and how God intended out food to be made and consumed.
I love learning how food was made, preserved, harvested, etc., hundreds of years ago. While we have so many great modern technologies and processes that get food on tables easier and faster these days, it doesn’t always mean the food is healthier.
While it may impossible to do everything exactly how our ancestors did (and maybe we don’t need to), there is a simple joy in picking one or several things to change in our modern life to go back to how it was done previously.
Milling grain is great way to get in touch with ancient practices and add more nutrient-dense food to your family’s table as well.
Pin It For Later!

What has freshly milled flour done for our family?
It took me a while to save up for a grain mill but once I got one, I really saw the benefit.
Although our family doesn’t have an aversion to regular all purpose flour, I can speak to how the grains make us feel. Because they are higher in nutritional content, the bread made from freshly milled grains is more sustainable in our bodies and keeps our blood sugar balanced in a way we never experienced before.
What this means is you won’t feel a blood sugar spike and then crash with whole grain, like you would if you just ate a regular piece of all purpose flour bread.
Using freshly milled whole grains in your kitchen is a powerful way to nourish your family from the inside out. Unlike store-bought flour, which is often stripped of its germ and bran (where most of the nutrients are), freshly milled flour contains all parts of the grain: the bran, germ, and endosperm. That means you’re getting the full spectrum of fiber, B vitamins, healthy fats, antioxidants, and minerals like magnesium and zinc — all of which support digestion, brain function, and blood sugar stability.
Freshly milled flour also has a lower glycemic index compared to refined flour, making it a better option for blood sugar regulation. And because the oils in the grain are still fresh, the flavor is deeper, nuttier, and far more satisfying than anything you’ll find on a grocery shelf.
Many people find that whole grain sourdough, made with fresh flour, is easier to digest and less likely to cause gluten sensitivity symptoms due to the fermentation process breaking down complex proteins and phytic acid.
The Whole Grains Council has a nice breakdown of the nutritional benefits of whole grains.

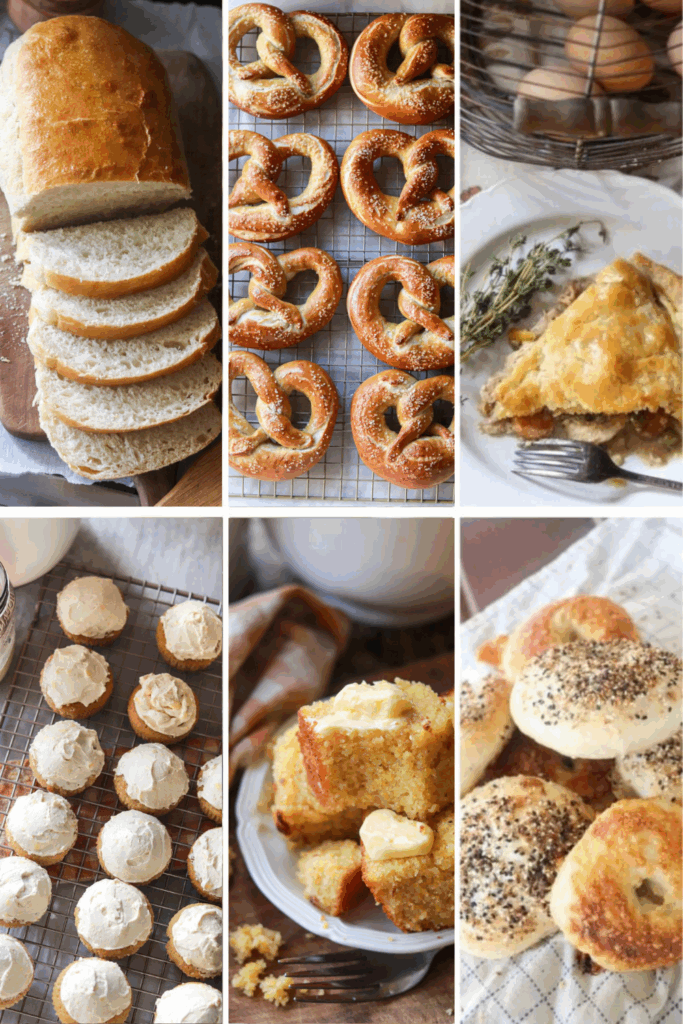
More Whole Grain Recipes from the Homestead
Freshly Milled Sourdough Buttermilk Pancakes
Buttermilk Honey Biscuits with Freshly Milled Whole Grain
Sourdough Pizza with Freshly Milled Whole Grain
Whole Grain Sourdough Banana Muffins with Freshly Milled Flour
Sourdough Dinner Rolls with Freshly Milled Whole Grain
Easy Sourdough Whole Grain Blueberry Muffins with Cornmeal
What’s in a freshly milled whole grain sourdough boule recipe?
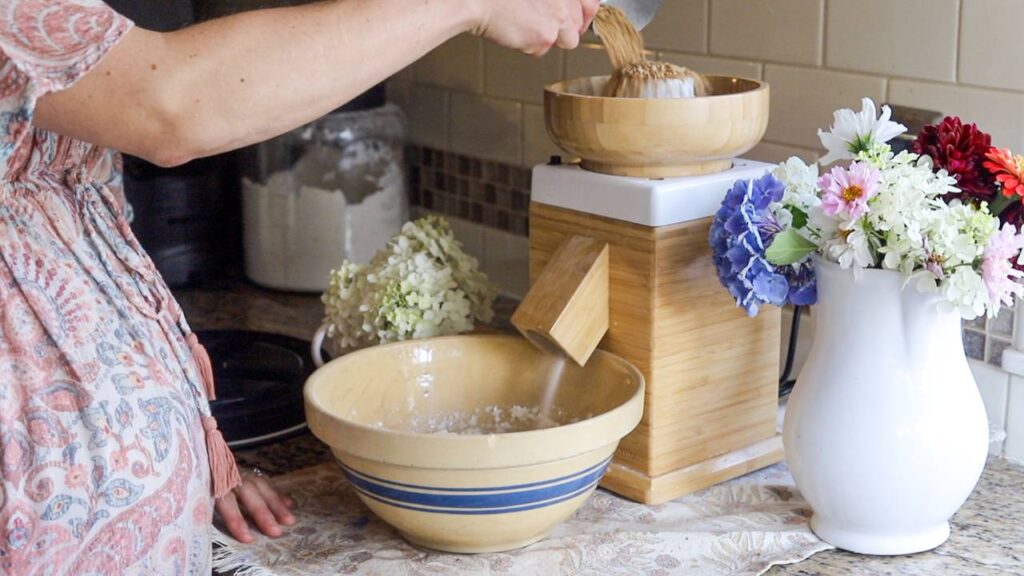
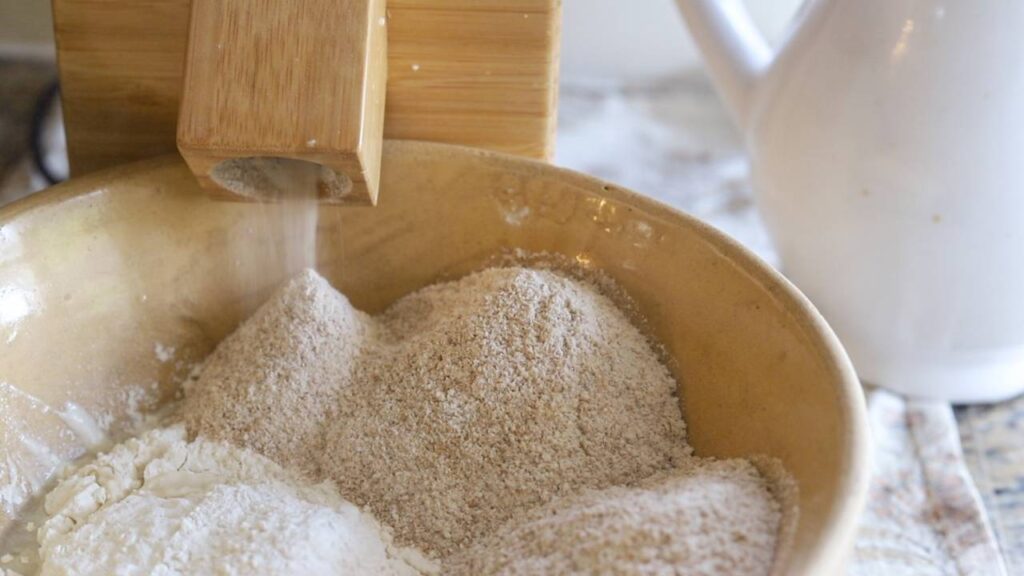
Freshly Milled Whole Grain Flour
Home-milled flour is rich in fiber, vitamins, and essential oils. Unlike store-bought flour, it hasn’t been stripped of its nutrients — resulting in better flavor and health benefits.
Sourdough Starter
A wild yeast culture that naturally leavens the bread without commercial yeast. It brings depth of flavor, better digestion, and a lovely crust to your boule.
Water
Filtered or spring water is ideal — chlorine can inhibit fermentation. Hydration is key for whole grain doughs; don’t skimp!
Salt
Essential for flavor and structure. Salt also slows fermentation just enough to develop a deeper taste in sourdough.
Substitutions and Baking Tips
This recipe is based on my rustic sourdough bread recipe that I created for the beginner sourdough baker. That one uses 100% all purpose flour. This whole grain recipe uses 50% freshly milled grain and 50% all purpose. I find this to be the perfect balance of grain so you get the desired texture and crumb but still with some of the health benefits of whole grain.
For a 100% whole grain recipe, use 3 1/4 cups hard white wheat berries (about 4 cups total freshly milled flour).
If the loaf comes out too dense, try adding 1/8 cup more water, or 1/4 less flour next time.
Be sure to ferment your dough in a warm location in your kitchen. I like using the back of the stove while I cook all day.
Can you use sourdough discard?
If you have fed your sourdough starter in the last week or so, yes, you can use the unfed starter (also known as discard). I maintain anywhere from 1/2 cup to 2 cups of sourdough starter in my fridge at all times, and I feed it usually the morning of starting this recipe so it is nice and bubbly. But, you can also start with a discard assuming it has been fed fairly recently and isn’t completely flat.
Baker’s Timeline
Sourdough bread, from the moment you feed your starter to the moment the loaf comes out of the oven, takes about 24-36 hours when long fermented.
A couple of things to keep in mind:
First, the temperature of your house plays a part in how fast your dough will rise and ferment. The warmer it is, the faster it will go. So a loaf may take 36 hours in the winter but only 12 hours in the summer.
Second, this timeline is not rigid. It is simply a guideline of how I cook my bread most of the time. There is really not set amount of time that sourdough bread takes. There is a learning curve that you’ll come to love with practice where you “just know” when your bread is ready, so keep on making bread!
Saturday morning: Take starter out from the fridge and feed it. Let sit on the counter all day until it passes the float test.
On Saturday late afternoon: Phase 1 – Make the Dough
Then Saturday evening: Phase 2 – Stretch and folds
Saturday over night: Phase 3 – Bulk Rise
Sunday morning: Phase 4 – Shape & Second Rise
Sunday afternoon: Phase 5 – Bake the Bread
You can learn how to make your own sourdough starter from scratch to make homemade bread, sourdough pizza, bagels, and more.
Put all your sourdough recipes in one spot!
Download and print off this NEW sourdough recipes ebook and keep your favorite sourdough recipes on your counter for easy, every day cooking.


Tools Needed
Large bowl (you can also use a standup mixer with a dough hook attachment)
Fork
Measuring cups and measuring spoons
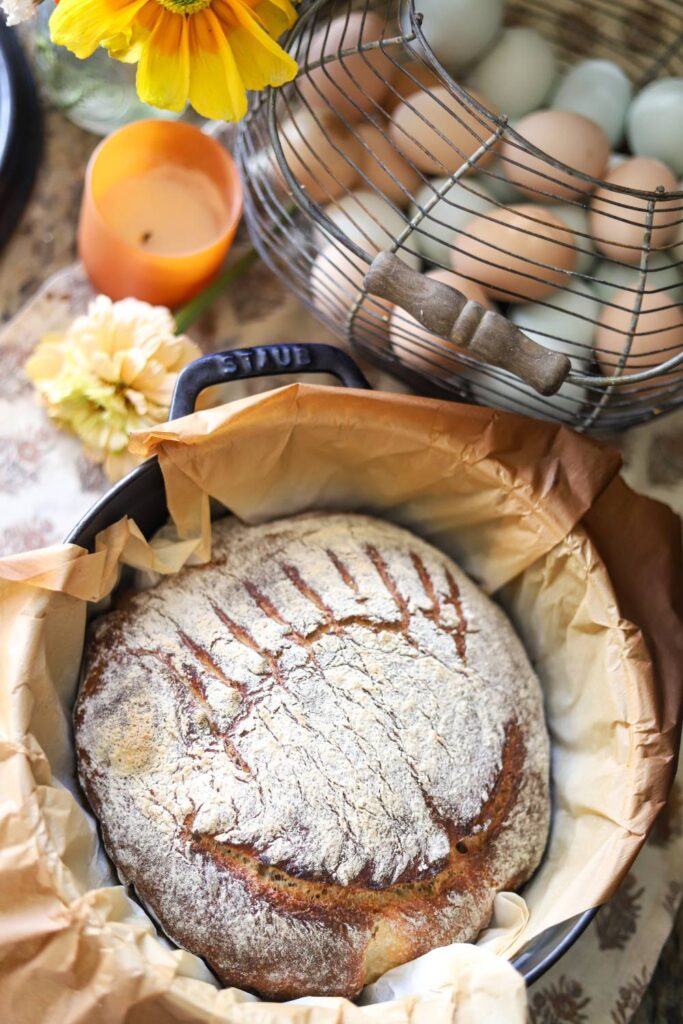
Dutch oven
Parchment paper
Scoring lame (or sharp bread knife)
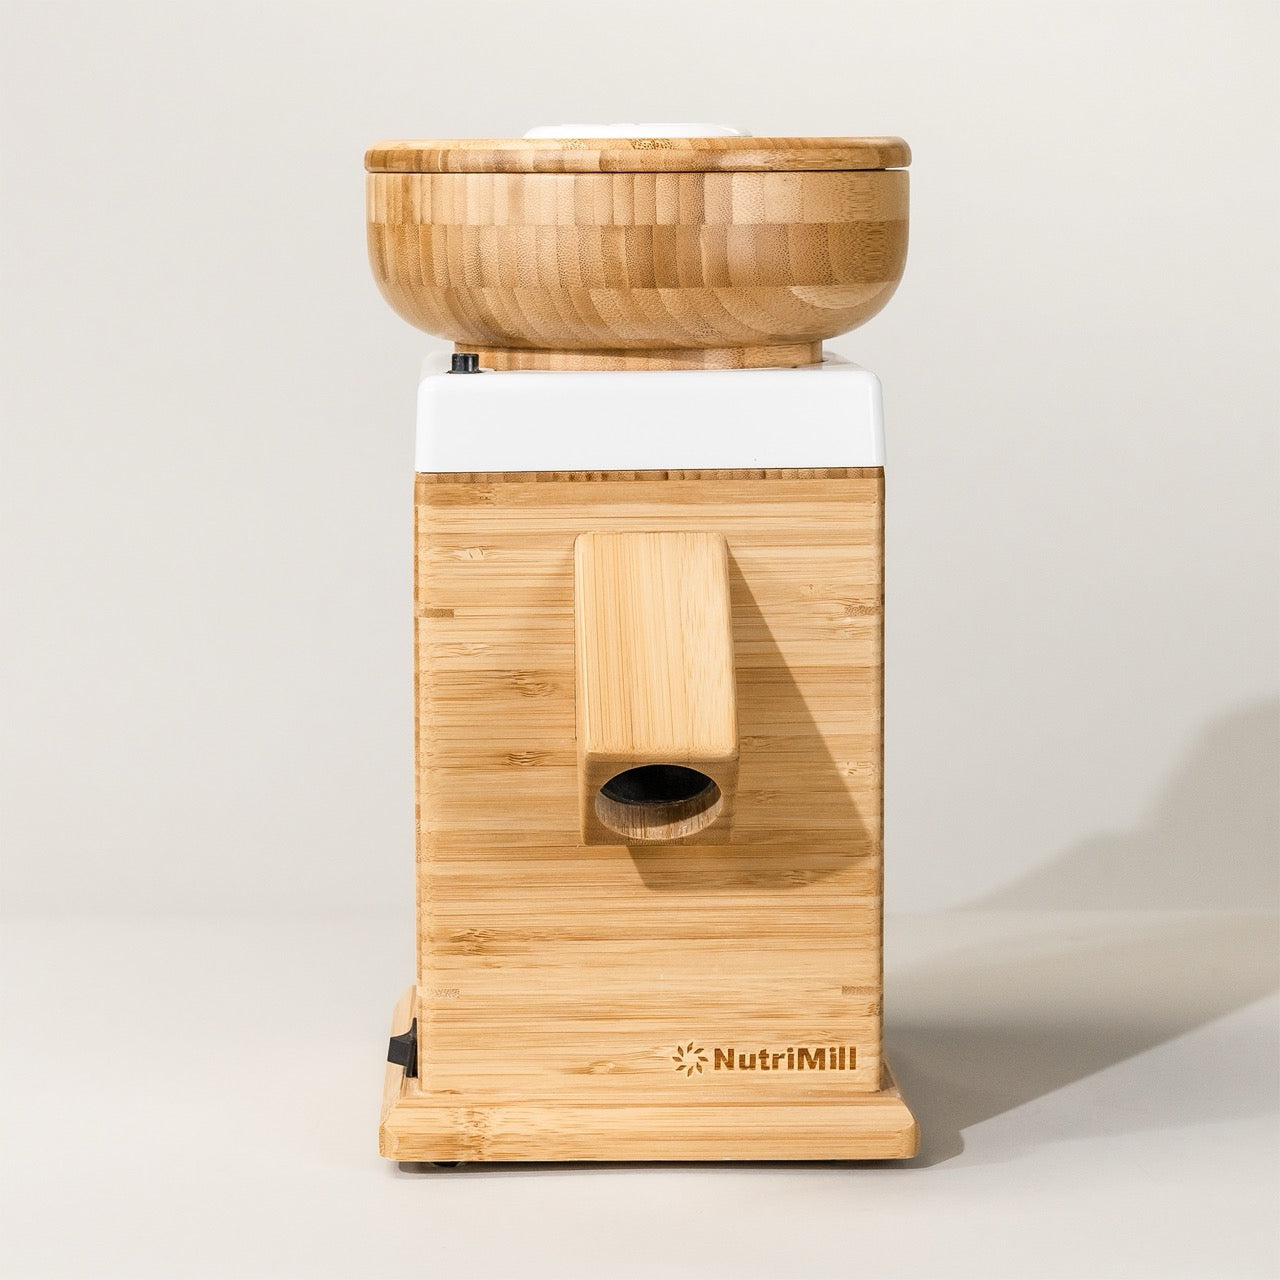
grain mill (optional – if freshly milling the grains)
Whole Grain Sourdough Boule Recipe
Note: see recipe variations section for substitutions and baking tips!
3/4 cup fed active sourdough starter
2 tsp salt
1 1/2 cup filtered water
2-3 tbsp honey
2 tbsp avocado oil
2 cups regular all purpose flour
1 1/2 cup hard white wheat berries (about 2 cups freshly milled flour total)
How to Make a Whole Grain Freshly Milled Sourdough Boule
Phase 1 – Make the Dough (3-5 min active time)
Pour the sourdough starter, salt, water, honey, and oil into a large mixing bowl and whisk together with a fork.
Next add the flour. With your hands or a stand up mixer with a dough hook attachment, combine all ingredients for about 20 seconds until all the flour is cleaned off the sides of the bowl. The dough will feel sticky and that’s normal!
Let the dough rest. Put a tea towel on top of the bowl and set on the counter for 30 minutes to an hour.
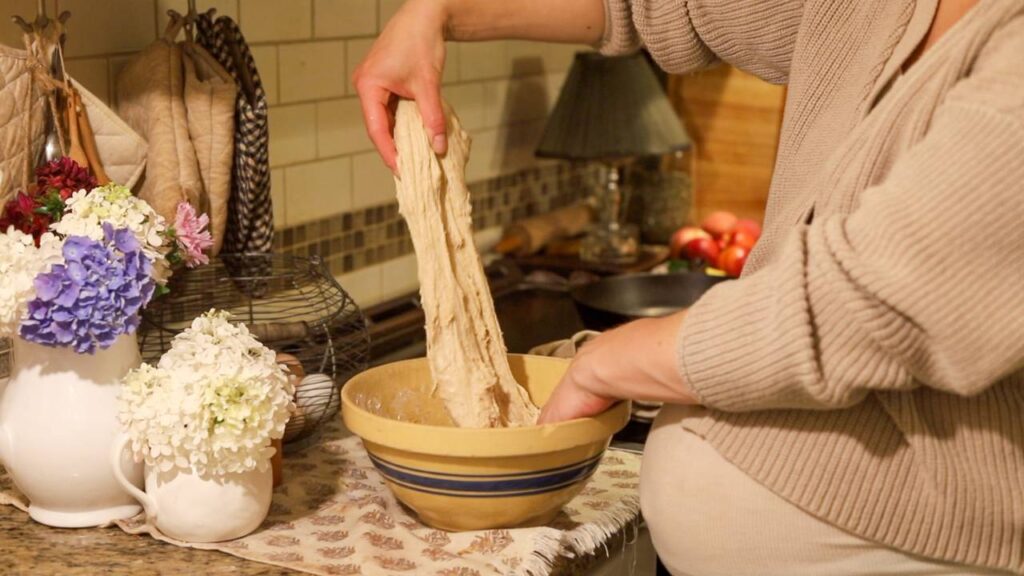
Phase 2 – Stretch and Folds (1 min active time)
Starting from one end of the dough, lift it up and fold it over itself into the center of the dough. Then rotate the bowl 90 degrees and repeat, until all sides have been stretched and folded. So, four times total.
Cover the bowl and let sit out on the counter.
Then, repeat the lifts and tucks 2 more times (for a total of 3 times), each about one hour apart. Now, don’t get too obsessed with this part. This is just creating nice volume in your bread. If you skip one or let two hours go by instead of one, it’s totally okay.
Phase 3 – Bulk Ferment (30 sec active time)
The easiest (and most important) phase!
Cover the bowl with plastic wrap. Place in the fridge and let bulk ferment overnight.


Phase 4 – Shape & Second Rise (5 min active time)
Pull the dough out of the fridge and clear a spot on your countertop. On half the counter, sprinkle some flour and leave the other half clean with no flour.
Remove the dough from the bowl and place on the flour side. Do one more round of the stretch and folds to form your dough.
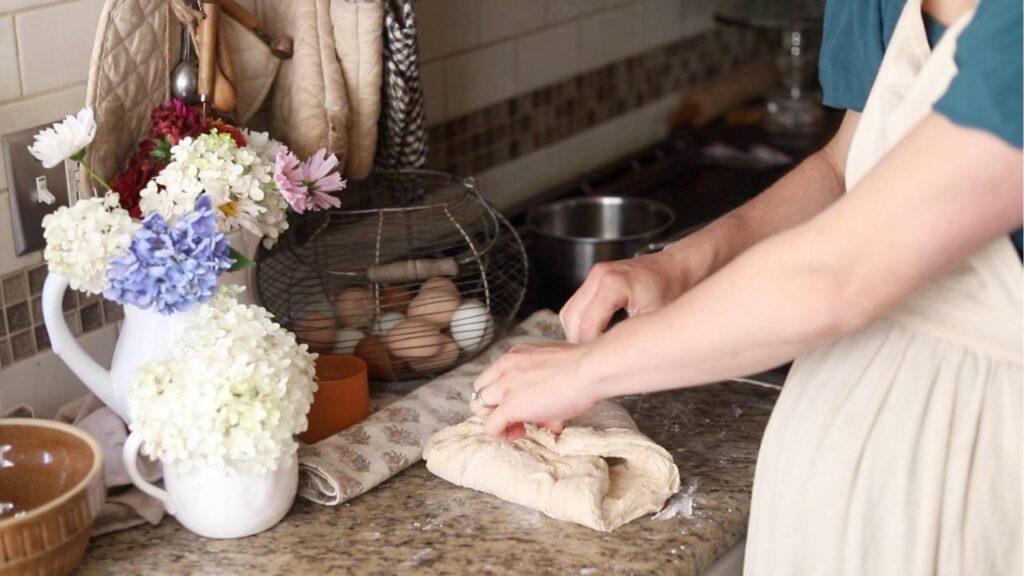
Remove the dough from the flour side, flip it over, and set it on the non-flour side.
Form the letter C with your hands and use a cupping motion around the dough to create a ball. Rotate the ball with short rotations in a circle. You should have a dough ball that is easy to pick up and not sticky now.
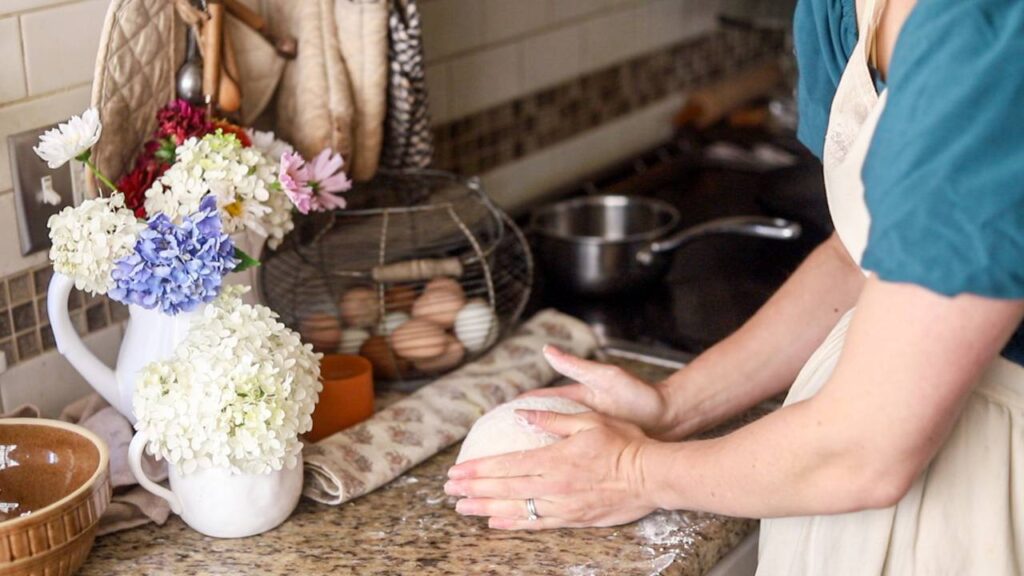
Grab a sheet of parchment paper and set the dough on the parchment paper.
Pick up the parchment paper and set the dough in a dutch oven. Cover with a tea towel and let sit in a warm spot on the counter for at least 2 more hours.
Phase 5 – Bake the Bread (35-45 minutes active time)
First, take your bread out of the dutch oven.
Turn your oven onto 450 degrees F and place the dutch oven (empty) into the oven to preheat with it.
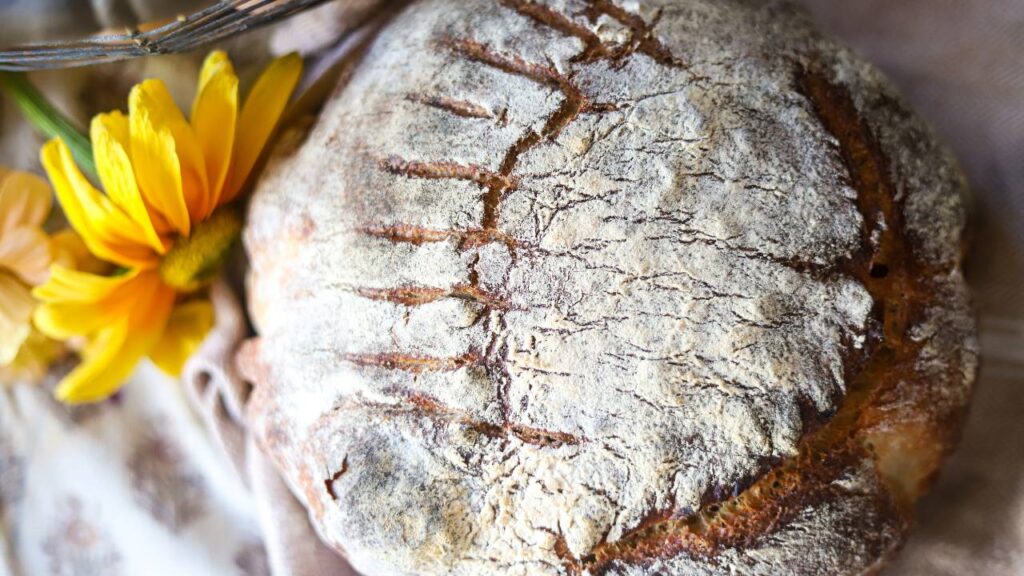
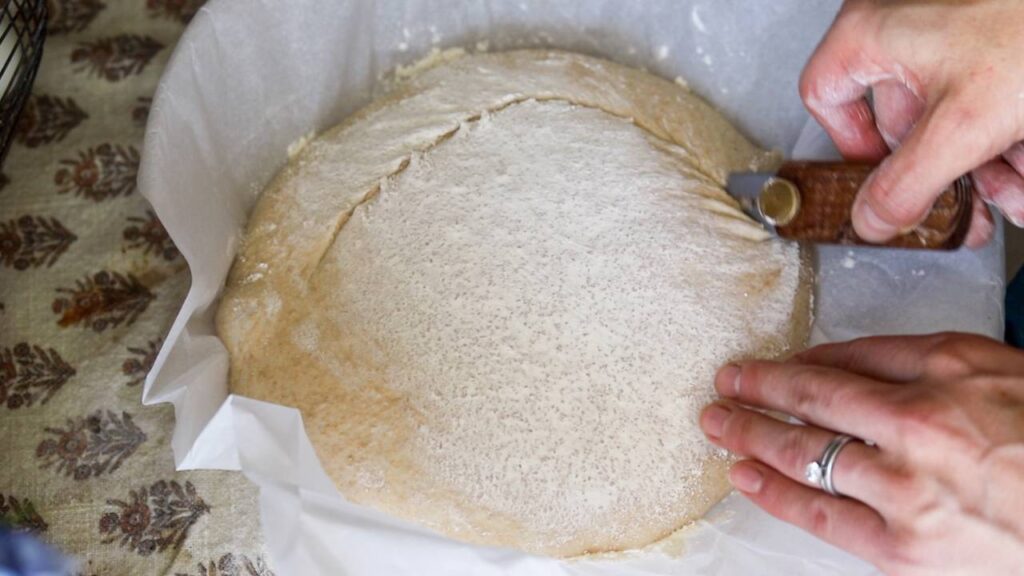
Once the oven is preheated, score your bread. Scoring is the process of creating a slit in the dough so that it can breathe and rise in the oven. You can use a bread lame or a simple serrated knife.
Carefully place the parchment paper with the bread on it back inside of the dutch oven (careful, it will be hot!)
Cover the dutch oven with the bread inside and place it in the oven.
Bake for 20 minutes with the lid on, and then another 15 minutes with the lid off. The cook time may vary depending on your oven.
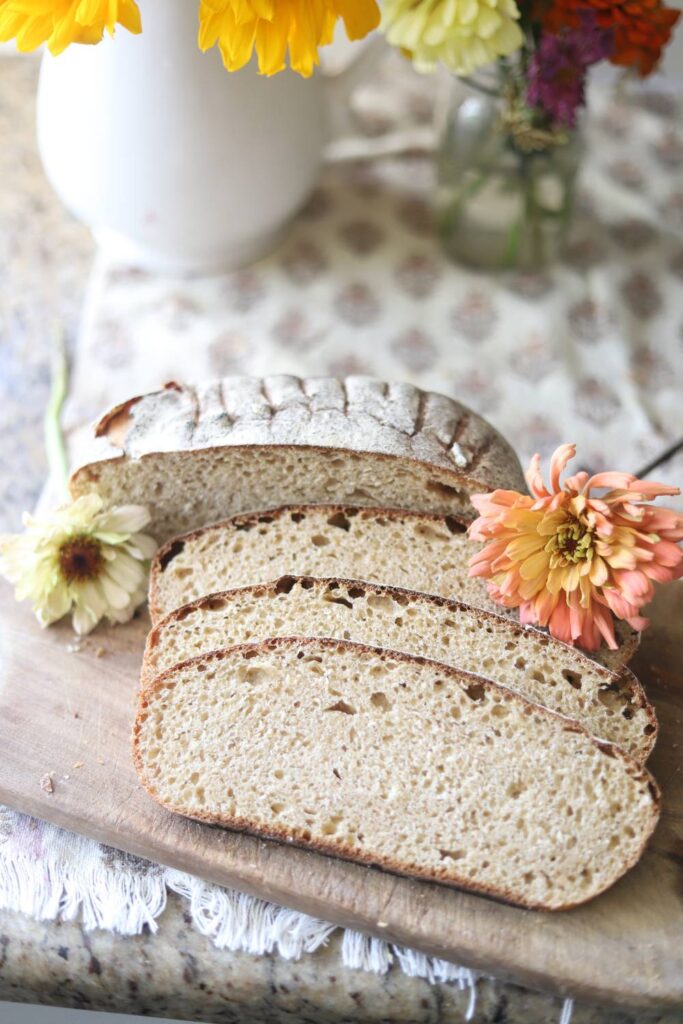
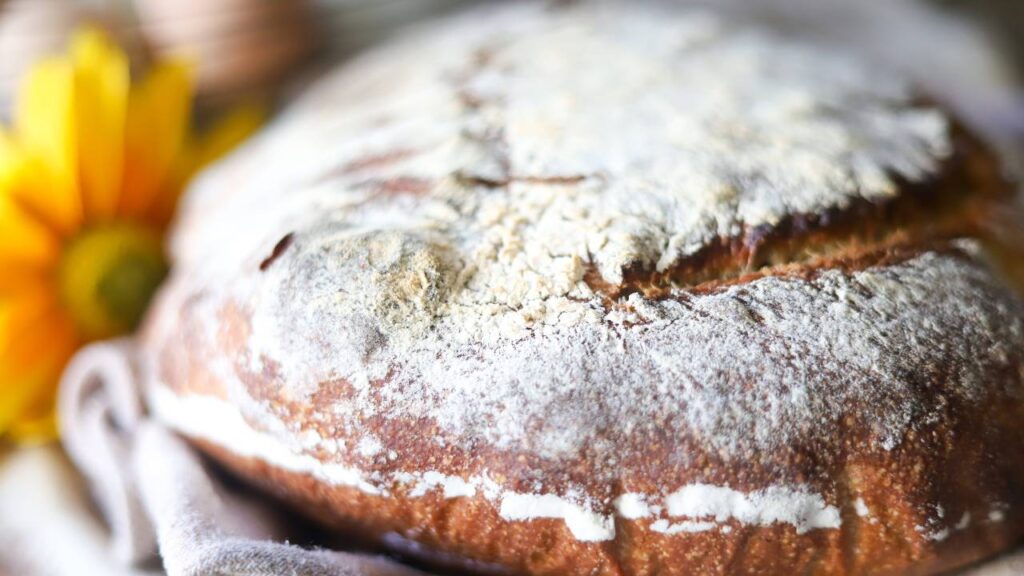
When your bread is done, carefully transfer it to a cooling rack (the dutch oven will be very hot). Do not cut it open! I know it’s tempting, but the bread is actually still baking. Put your ear up close and you’ll hear the crackling of the dough still forming. Leave it be about an hour and then enjoy.
FAQs:
Can I use all freshly milled flour in sourdough bread?
For a 100% whole grain recipe, use a little over 3 cups hard white wheat berries (about 4 cups total freshly milled flour).
What kind of wheat berries should I use?
Hard red or hard white wheat berries both work fine, but I prefer hard white wheat berries.
Why does my boule come out flat?
Whole grain doughs can be weaker due to the bran content. A strong starter, proper fermentation, and a good shaping technique are key to getting a tall, round boule. If you are still unhappy with your loaf, you might want to add more all purpose flour and less whole grain. Also, whole grain does take some time to get used to, so keep trying and you may find that you get used to the different texture and taste!
Save It For Later!
More Sourdough Recipes from the Homestead
Delicious Sourdough Vanilla Cupcakes
Same Day Sourdough Bread Recipe
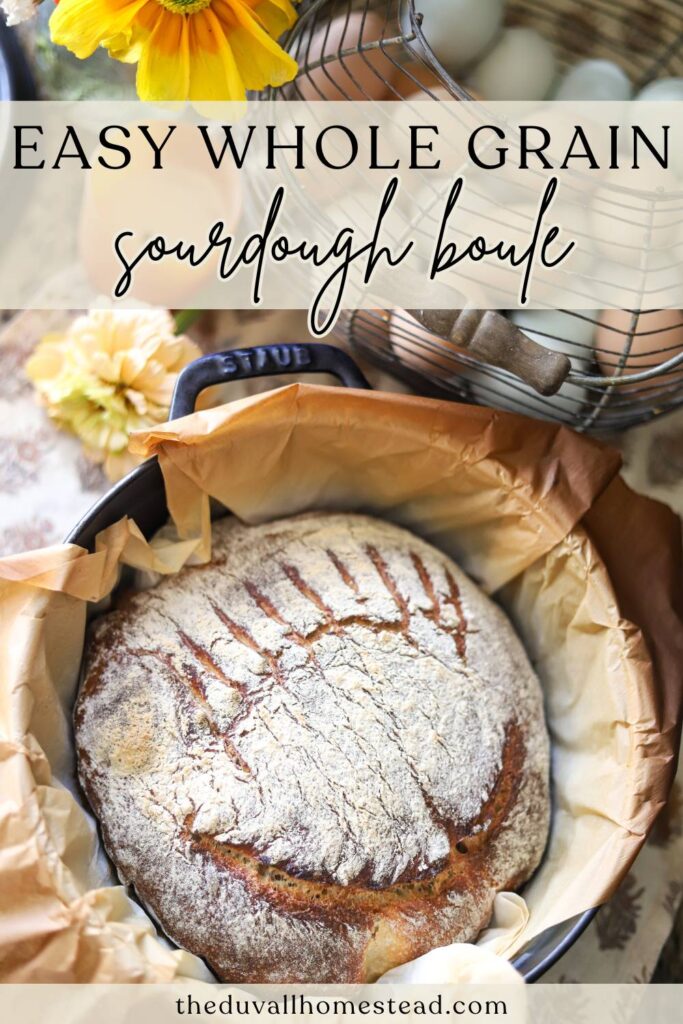
Easy Freshly Milled Whole Grain Sourdough Boule Recipe
Learn how to make a rustic whole grain sourdough boule with freshly milled flour and a bubbly starter. This beginner-friendly loaf is packed with nutrition, flavor, and a beautiful golden crust.
Ingredients
- Note: see recipe variations section for substitutions and baking tips!
- 3/4 cup fed active sourdough starter
- 2 tsp salt
- 1 1/2 cup filtered water
- 2-3 tbsp honey
- 2 tbsp avocado oil
- 2 cups regular all purpose flour
- 1 1/2 cup hard white wheat berries (about 2 cups freshly milled flour total)
Instructions
Phase 1 – Make the Dough (3-5 min active time)
- Pour the sourdough starter, salt, water, honey, and oil into a large mixing bowl and whisk together with a fork.
- Next add the flour. With your hands or a stand up mixer with a dough hook attachment, combine all ingredients for about 20 seconds until all the flour is cleaned off the sides of the bowl. The dough will feel sticky and that’s normal!
- Let the dough rest. Put a tea towel on top of the bowl and set on the counter for 30 minutes to an hour.
Phase 2 – Stretch and Folds (1 min active time)
- Starting from one end of the dough, lift it up and fold it over itself into the center of the dough. Then rotate the bowl 90 degrees and repeat, until all sides have been stretched and folded. So, four times total.
- Cover the bowl and let sit out on the counter.
- Then, repeat the lifts and tucks 2 more times (for a total of 3 times), each about one hour apart. Now, don’t get too obsessed with this part. This is just creating nice volume in your bread. If you skip one or let two hours go by instead of one, it’s totally okay.
Phase 3 – Bulk Ferment (30 sec active time)
- The easiest (and most important) phase!
- Cover the bowl with plastic wrap. Place in the fridge and let bulk ferment overnight.
Phase 4 – Shape & Second Rise (5 min active time)
- Pull the dough out of the fridge and clear a spot on your countertop. On half the counter, sprinkle some flour and leave the other half clean with no flour.
- Remove the dough from the bowl and place on the flour side. Do one more round of the stretch and folds to form your dough.
- Remove the dough from the flour side, flip it over, and set it on the non-flour side.
- Form the letter C with your hands and use a cupping motion around the dough to create a ball. Rotate the ball with short rotations in a circle. You should have a dough ball that is easy to pick up and not sticky now.
- Grab a sheet of parchment paper and set the dough on the parchment paper.
- Pick up the parchment paper and set the dough in a dutch oven. Cover with a tea towel and let sit in a warm spot on the counter for at least 2 more hours.
Phase 5 – Bake the Bread (35-45 minutes active time)
- First, take your bread out of the dutch oven.
- Turn your oven onto 450 degrees F and place the dutch oven (empty) into the oven to preheat with it.
- Once the oven is preheated, score your bread. Scoring is the process of creating a slit in the dough so that it can breathe and rise in the oven. You can use a bread lame or a simple serrated knife.
- Carefully place the parchment paper with the bread on it back inside of the dutch oven (careful, it will be hot!)
- Cover the dutch oven with the bread inside and place it in the oven.
- Bake for 20 minutes with the lid on, and then another 15 minutes with the lid off. The cook time may vary depending on your oven.
- When your bread is done, carefully transfer it to a cooling rack (the dutch oven will be very hot). Do not cut it open! I know it’s tempting, but the bread is actually still baking. Put your ear up close and you’ll hear the crackling of the dough still forming. Leave it be about an hour and then enjoy.
Recommended Products
As an Amazon Associate and member of other affiliate programs, I earn from qualifying purchases.


Leave A Comment